The Home Staging Process: From First Consultation to Final Sale
The Home Staging Process: From First Consultation to Final Sale
What the Home Staging Process Really Involves — and Why It Matters
The home staging process is one of the most powerful tools a seller can use to attract buyers, reduce time on market, and walk away with a stronger offer. Yet most sellers underestimate what it actually involves — or assume it’s just tidying up before photos.
Here’s a quick overview of the core steps:
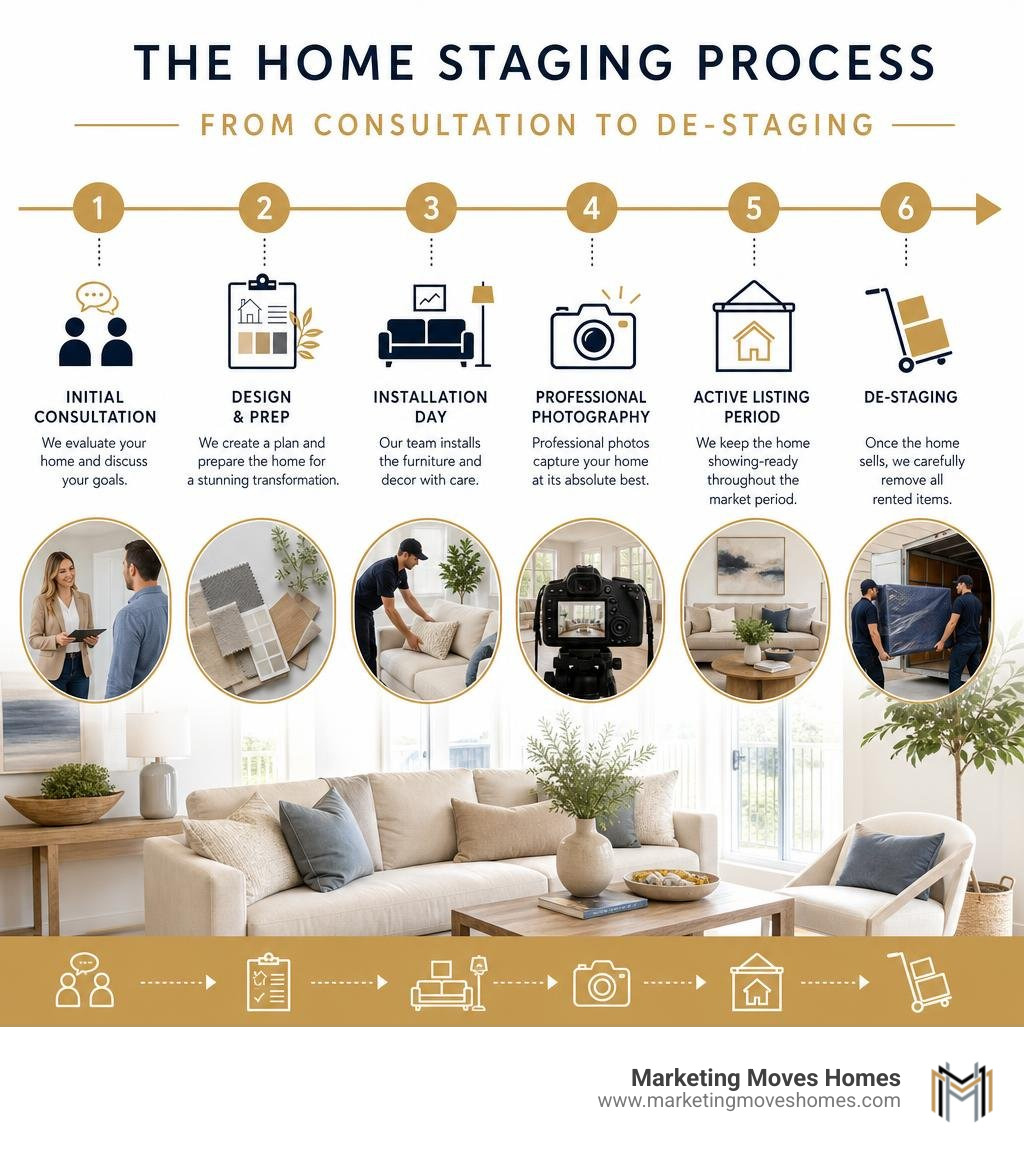
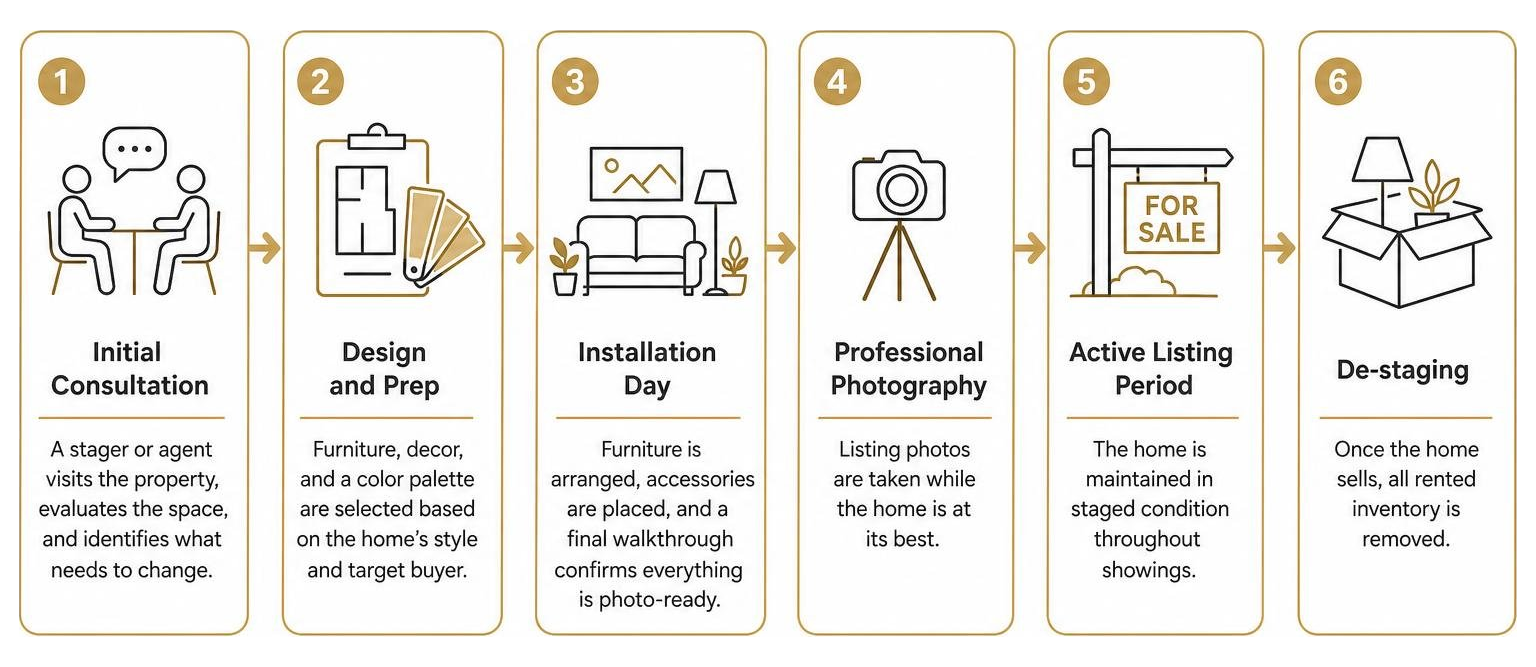
- Initial consultation — A stager or agent visits the property, evaluates the space, and identifies what needs to change.
- Design and prep — Furniture, decor, and a color palette are selected based on the home’s style and target buyer.
- Installation day — Furniture is arranged, accessories are placed, and a final walkthrough confirms everything is photo-ready.
- Professional photography — Listing photos are taken while the home is at its best.
- Active listing period — The home is maintained in staged condition throughout showings.
- De-staging — Once the home sells, all rented inventory is removed.
The numbers back this up. According to the National Association of Realtors, 83% of buyers’ agents say staging makes it easier for buyers to picture a property as their future home. More than a quarter of real estate professionals report that staging netted 1% to 10% more in the dollar value offered — and about half of seller’s agents saw a measurable decrease in time on market.
For Central Florida sellers competing in markets like Lake Nona, Windermere, and Winter Park, where buyers increasingly search online first and form opinions in seconds, staging isn’t optional — it’s the baseline.
I’m Scott Brazdo MBA, Co-Founder of Marketing Moves Homes and a REALTOR® with over 30 years of marketing experience helping Central Florida sellers maximize their listing exposure through professional presentation — including a thorough understanding of how the home staging process directly impacts buyer engagement and final sale price. In this guide, I’ll walk you through every phase of the process so you know exactly what to expect and how to make it work for your home.
Step-by-Step: The Professional Home Staging Process Explained
When you pull back the curtain on professional staging, you quickly realize it is a highly coordinated logistics and design operation. It is not just about placing a few throw pillows on a couch; it is a strategic business process designed to maximize the perceived value of your property.

As outlined in the National Association of REALTORS® Consumer Guide: Staging Your House for a Sale, staging is centered on decluttering and styling rather than remodeling. It is about presenting a clean, neutral backdrop that allows buyers to see the home as their own.
To execute this effectively, a professional staging timeline moves through several distinct phases. Let’s look at how the workflow breaks down from start to finish:
Why the Home Staging Process Matters for Central Florida Sellers
In our local market—especially in high-demand, high-expectation communities like Lake Nona (specifically the 32827 and 32832 ZIP codes), Windermere, and Winter Park—buyers expect a move-in-ready aesthetic.
According to real estate data, 71% of buyers are looking for a move-in-ready home. If your property looks like it requires immediate work, buyers will either walk away or heavily discount their offers.
Staging solves this problem. Local market insights from Why Staging Your Home to Sell Is Important show that staged homes in Central Florida consistently stand out in online searches, which is where almost all buyers begin their journey.
By utilizing the home staging process, you are not just decorating; you are directly influencing key transaction metrics:
- Faster Sales: 73% of staged homes sell faster than non-staged homes.
- Higher Offers: Staged homes typically sell for 1% to 5% above list price compared to similar unstaged homes.
- Reduced Days on Market: 53% of seller’s agents report that staging decreases the time a home sits on the active market.
Phase 1: Initial Consultation and Property Assessment
The process begins with an on-site visit and property assessment. This is where we analyze the home’s architecture, natural light, and layout.
However, we do not look at the home in a vacuum. We perform a neighborhood analysis to understand the local market dynamics. For instance, a home in Lake Nona’s Laureate Park appeals to a different demographic (often young professionals or medical researchers working in Medical City) than an estate in Windermere or a historic property in Winter Park.
During this phase, we screen the client’s goals, establish the target buyer profile, and draft a tailored staging proposal. Behind the scenes, we use advanced workflow software like 17hats to manage scheduling, invoices, and design agreements, ensuring a seamless experience from day one.
Phase 2: Studio Prep and Inventory Selection
Once the proposal is approved, the work shifts to the staging studio or prop house. Managing a professional staging inventory requires a massive selection of on-trend furniture, rugs, art, and accessories. If you have ever wondered How To Start a Home Staging Business – Home Staging Institute, you know that inventory management and sourcing are the backbone of the entire business model.
During studio prep, the design team uses a “big-to-small” approach:
- Large Furniture: Selecting the anchor pieces (sofas, dining tables, beds) that define the scale of each room.
- Layering Rugs and Lighting: Choosing area rugs to define zones and lamps to layer the lighting.
- Accessories and Art: Packing up the final details—vases, throw pillows, books, and greenery.
This preparation process typically takes 4 to 6 hours with two team members working in the studio. Because of the logistical coordination required, staging companies generally require at least a 3-day notice before the scheduled installation day to properly prep and pack the inventory.
Phase 3: Installation Day and Final Walkthrough
Installation day is where the heavy lifting happens. It involves professional movers, detailed project coordination, and precise physical placement.
On average, a complete home staging project requires 75 to 85 man-hours from the initial phone call to the final de-staging. On the day of installation, the team coordinates the load-in, unpacks the inventory, and begins arranging the spaces.
We pay close attention to traffic flow, ensuring there are clear 3-foot pathways through every room. We “float” furniture 12 to 18 inches off the walls to make spaces feel larger and more conversational.
Once every accessory is styled to perfection, we perform a final walkthrough to check sightlines and ensure the home is ready for our professional real estate photographer. High-quality photography is the highest-ROI single line item on any staging checklist, as it translates the physical staging into digital drive-by appeal for online buyers.
Room-by-Room Guide: Prioritizing High-Impact Spaces
You do not necessarily need to stage every single square foot of your home to see a massive return. Instead, you should focus your time, energy, and budget on the high-impact areas that buyers care about most.
Before diving into specific rooms, remember the foundational rule of the home staging process: decluttering and depersonalizing.
We recommend the One-Thirds Rule: for every visible surface (like a kitchen counter, mantel, or bookshelf), remove at least two-thirds of the items, leaving only one-third of carefully curated, non-personal decor.
Additionally, we advise our clients to pre-pack 30% to 50% of their belongings, leaving closets no more than two-thirds full to showcase abundant storage space. Applying a fresh coat of neutral paint (like warm white, light greige, or soft cream) is the single highest-impact aesthetic upgrade you can make, often delivering an average 107% return on investment.
Staging the Living Room to Maximize Space
The living room is often the first major space a buyer experiences, making it a critical focus area. To stage a living room effectively:
- Float the Furniture: Do not push all your furniture against the walls. Pull seating arrangements inward to create cozy, defined conversation areas.
- Use the Rule of Three: When styling mantels, coffee tables, or console tables, group items in threes of varying heights (e.g., a tall vase, a medium stack of books, and a small decorative bowl) to create visual balance.
- Define Zones with Rugs: Use an 8×10 area rug to anchor the main seating area, ensuring the front legs of all furniture sit on the rug.
- Maximize Natural Light: Open all blinds, wash the windows, and clean the window treatments. Ensure all light bulbs are standardized to a warm white temperature (2700K to 3000K) to avoid mismatched lighting in photos.
For additional inspiration on furniture placement and spatial flow, you can watch these Design & Staging Tips from Jason Saft | Apartment Therapy – YouTube.
Kitchen and Dining Room Home Staging Process
They say kitchens sell homes, and clean, spacious counters sell kitchens. In fact, kitchen quality is consistently cited as one of the top three factors in a buyer’s offer price.
- Clear the Counters: Clear your kitchen counters to 80% empty. Store away small appliances like blenders, toasters, and coffee makers. Stage the empty space with a single high-end cutting board, a bowl of fresh lemons, or an open cookbook on a stand.
- Update Hardware: Spend a few hundred dollars to replace dated cabinet knobs and pulls with modern matte black or brushed brass hardware.
- Organize Cabinets: Buyers will open your cabinets and pantry. Empty them to about 60% capacity and organize items neatly to suggest that the home has more than enough storage.
- Style the Dining Table: A set dining table tells the story of the room’s purpose. Use simple, neutral placemats, white plates, and a low centerpiece that does not block sightlines across the room.
For a comprehensive checklist on prepping these culinary spaces, refer to this practical How to stage your home to sell: a room-by-room checklist.
Primary Bedroom and Bathroom Home Staging Process
The primary suite should feel like a luxurious, restful retreat—a sanctuary away from the hustle and bustle of Central Florida life.
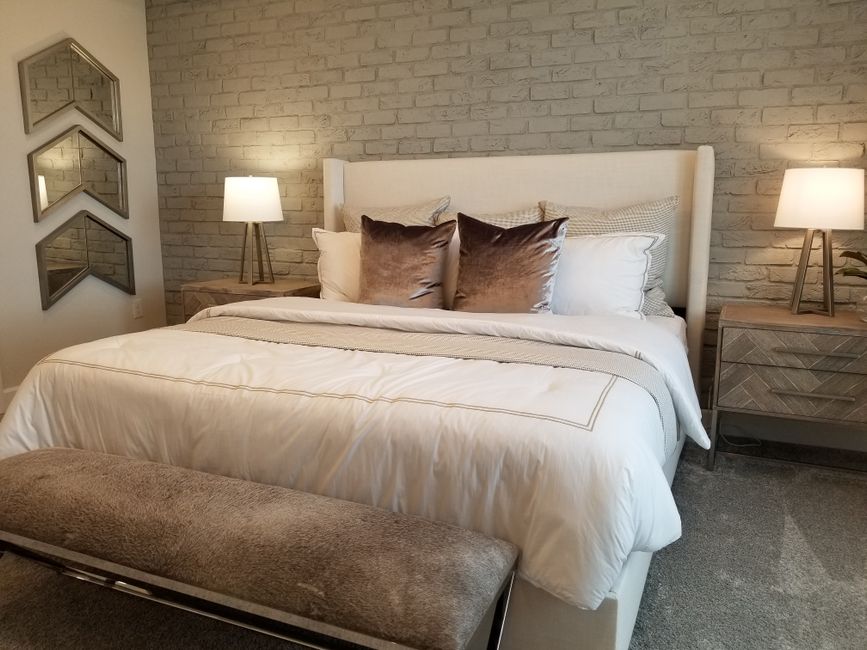
- Create Symmetry: Position the bed as the central focal point. Use symmetrical nightstands and matching lamps on both sides of the bed to establish visual balance.
- Hotel-Style Bedding: Dress the bed in crisp, neutral white bedding. Layer it with a folded duvet at the foot of the bed and a few textured throw pillows.
- Spa-Like Bathrooms: Remove all personal toiletries, medicines, and bathmats. Deep-clean the grout, polish the fixtures, and hang fluffy, fresh white towels.
- Clear the Medicine Cabinet: Buyers will peek inside. Empty your medicine cabinet to 30% capacity and remove all personal items.
To keep track of these detailed room-by-room tasks, we recommend printing out this comprehensive Home Staging Checklist (Room by Room) | Greylyn Wayne — Portland, OR to guide your physical preparation.
Comparing Your Staging Options: DIY vs. Professional vs. Virtual Staging
Depending on your budget, timeline, and the current condition of your home, you have several different paths you can take to stage your property. Let’s compare the three most common options:
| Feature / Option | DIY Staging | Professional Staging | Virtual Staging |
|---|---|---|---|
| Average Cost | $150 – $600 (supplies/cleaning) | $2,000 – $5,000+ (rental & design) | $20 – $30 per listing photo |
| Time Investment | High (you do all the physical labor) | Low (stagers handle everything) | Extremely Low (digital turnaround) |
| Best Suited For | Lived-in homes needing editing | Vacant homes, luxury properties | Vacant or highly dated properties |
| Pros | Lowest out-of-pocket cost | Maximum physical impact for showings | Affordable, fast, tests layouts digitally |
| Cons | Easy to make styling mistakes | Higher upfront investment | Physical home remains empty during tours |
If you are looking for a complete breakdown of budget-friendly staging strategies, you can explore The Ultimate Home Staging Checklist: 10 Steps for a Faster Sale in 2026 – Try Furnishly.
While DIY staging is highly cost-effective for lived-in homes, vacant properties almost always benefit from professional physical staging or, at the very least, virtual staging. Virtual staging uses advanced software to digitally insert realistic furniture into your listing photos. If you choose virtual staging, just remember that the National Association of REALTORS® Code of Ethics requires you to disclose that the photos have been virtually staged so buyers are not surprised during physical tours.
Frequently Asked Questions About Home Staging
Deciding how to approach the staging process often comes with several practical questions. Here are the answers to the most common questions we hear from Central Florida home sellers. For a broader look at how staging impacts your bottom line, check out this guide on Does Home Staging Really Work? What Sellers Should Know.
How much does professional home staging cost on average?
According to national data, the median cost of home staging is $675, which typically covers an initial professional consultation and minor styling. However, for a full-service professional staging project—which includes renting furniture, coordinating movers, and styling multiple rooms—the national average is about $1,849, with most projects falling between $832 and $2,917.
In high-end Central Florida neighborhoods like Lake Nona, Windermere, and Winter Park, full-service staging for luxury or executive-sized homes typically ranges from $2,000 to $5,000+ for a standard 3-month contract.
Pricing is heavily influenced by:
- The square footage of the home and the number of rooms being staged.
- Whether the home is vacant (requiring full furniture rental) or occupied (utilizing existing furniture).
- Local inventory rental rates and logistics fees.
If you are looking for local staging directories or professionals, you can browse listings on Yelp, such as THE BEST 10 Home Staging near MENLO PARK, CA 94025 – Yelp, to see how regional pricing and service structures compare, or look into local Orlando experts like MHM Professional Staging: Orlando Home Staging Experts, Lake Nona Home Staging, Home Staging Pros LLC, or check out HOME STAGING PROS LLC – Project Photos & Reviews to find local design inspiration.
How long does the home staging process typically take?
For a typical 1,800 to 2,200 square foot home, the physical preparation and staging process takes about 5 to 7 days of active work. This includes:
- Days 1–2: Whole-house deep cleaning, decluttering, and minor repairs.
- Day 3: Curb appeal enhancements (pressure washing, landscaping, front door refresh).
- Days 4–5: Furniture arrangement, room styling, and lighting standardization.
- Day 6: Final walk-through and professional photography.
From a stager’s operational perspective, the entire pipeline—from the first consultation, design drafting, studio packing, on-site installation, and the final wrap-and-pack de-staging after the home sells—requires an average of 75 to 85 total man-hours.
Do I need to stage every room in my house?
No, you do not need to stage every single room. To optimize your budget, focus your staging efforts on the high-impact areas that buyers prioritize most. According to agent surveys, the priority order for staging is:
- The Living Room (The primary gathering space and first impression).
- The Kitchen (The heart of the home and a major value driver).
- The Primary Bedroom (The buyer’s personal retreat).
- The Bathrooms (Cleanliness and spa-like appeal are critical here).
- The Entryway / Curb Appeal (The very first physical interaction with the home).
Secondary bedrooms, laundry rooms, and garages can generally be left clean, painted, and completely decluttered without needing full decorative staging.
Conclusion
The home staging process is a proven, strategic investment that transforms your property from a personal living space into an aspirational product. By taking the time to declutter, depersonalize, paint, and professionally style your high-impact rooms, you directly influence how quickly your home sells and how much equity you walk away with at the closing table.
At Marketing Moves Homes, we specialize in helping Central Florida sellers navigate this entire process. We combine local market expertise in Lake Nona, Windermere, and Winter Park with cutting-edge real estate marketing—including professional photography, high-definition video tours, and targeted digital exposure—to get your beautifully staged home in front of the right buyers.
Are you thinking about selling your home in the greater Orlando area? Avoid inaccurate online automated home valuations that miss your home’s unique upgrades and local neighborhood trends. Instead, contact us today for a personalized, accurate home valuation and staging consultation.
- Ready to list? Visit our List My Home page to get started.
- Looking to buy? Explore our Buy a Home resources.
- Want to learn more about us? Meet the Team, read Our Story, or get in touch directly on our Contact page.